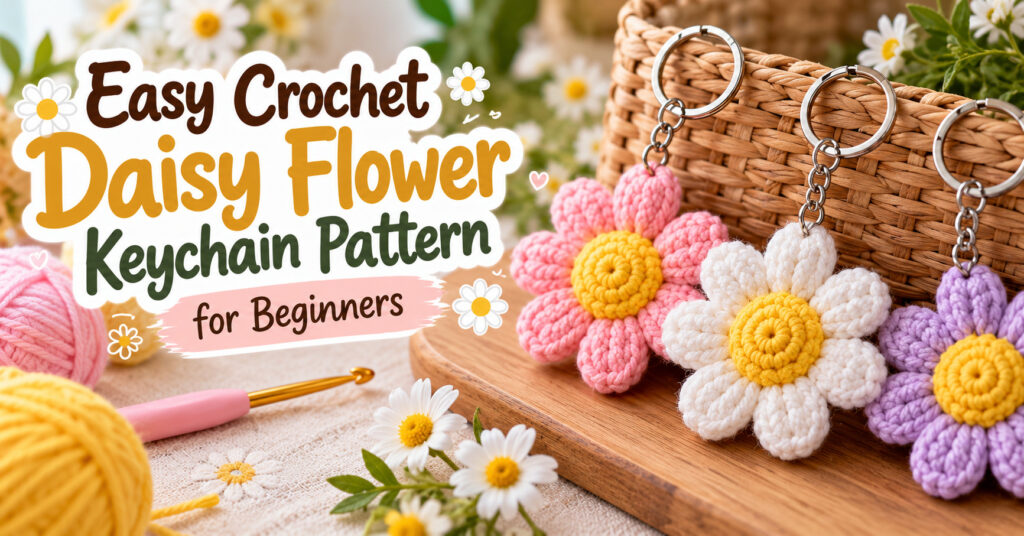
Looking for a cute and easy crochet project? This crochet daisy flower keychain is a lovely little accessory that you can make with a few basic supplies and your favorite yarn colors. Whether you want to decorate your keys, personalize a handbag, or create a handmade gift, this cheerful flower is a fun project to try.
In this tutorial, you will learn how to crochet a daisy flower, shape the petals, finish the center, and attach a keychain ring. You can customize your flower with classic white petals or experiment with pink, lavender, blue, and other beautiful colors.
Why You’ll Love This Crochet Daisy Keychain
This small crochet flower is perfect for using leftover yarn and practicing basic crochet stitches. Its compact size makes it suitable for everyday accessories, handmade gifts, and craft fairs.
Here are a few reasons to try this project:
- Beginner-friendly: Practice simple stitches without making a large project.
- Customizable: Choose different colors to match your style.
- Budget-friendly: Use small amounts of yarn from your existing collection.
- Versatile: Attach the flower to keys, backpacks, purses, or zipper pulls.
- Great for gifting: Handmade accessories make thoughtful gifts for friends and family.
Related : Mini Crochet Blossom Tree Pattern for Beautiful Home Decor
Materials You’ll Need
Gather the following supplies before starting your crochet daisy flower keychain.
- Worsted-weight or DK cotton yarn in yellow and white, or your preferred colors
- A crochet hook suitable for your yarn, approximately 2.5–3.5 mm
- A metal keychain ring with a short chain
- Scissors
- A yarn needle
- Stitch marker, if needed
- A small amount of stuffing, optional
Helpful tip: Cotton yarn is a good choice because it creates defined stitches and helps the flower maintain its shape.
Crochet Abbreviations
This pattern uses standard US crochet terminology.
- MR: Magic ring
- sc: Single crochet
- inc: Increase, working two single crochets into one stitch
- sl st: Slip stitch
- ch: Chain
- hdc: Half double crochet
- dc: Double crochet
- st(s): Stitch(es)
How to Crochet a Daisy Flower Keychain
This design uses a small yellow center and individual petals worked around its edge. The instructions below describe an original pattern concept; make a sample and verify the stitch placement and finished shape before publishing it as a tested pattern.
Step 1: Crochet the Yellow Center
Using yellow yarn, create a magic ring.
Round 1: Work 6 single crochet stitches into the ring. Pull the yarn tail to close the center.
Round 2: Work 2 single crochet stitches into each stitch around. You will have 12 stitches.
Round 3: Work 1 single crochet into each stitch around, keeping the stitch count at 12.
Join with a slip stitch and fasten off, leaving a yarn tail for finishing.
The center should form a small, flat circle. If the edges begin to curl, check your tension and hook size.
Step 2: Make the Daisy Petals
Attach white yarn to one stitch along the edge of the yellow center.
For the first petal:
- Chain 5.
- Starting in the second chain from the hook, work 1 slip stitch.
- Work 1 single crochet into the next chain.
- Work 1 half double crochet into the next chain.
- Work 1 double crochet into the final chain.
- Slip stitch into the next stitch along the yellow center to secure the petal.
Repeat this process around the center, attaching each new petal to the next available stitch.
You can make a compact flower with 12 petals using the 12 stitches around the center. For a fuller flower, use a larger center and adjust the number and spacing of the petals.
Important: This is a proposed stitch sequence, not a professionally tested pattern. Check that the petals lie flat and that the final petal joins neatly with the first before using the design commercially.
Step 3: Finish the Flower
Once all the petals are complete, fasten off the yarn and weave in the loose ends with a yarn needle.
Gently shape each petal with your fingers. Spread them evenly around the center so the flower looks balanced.
If you want a slightly thicker center, you can make two matching yellow circles, place a small amount of stuffing between them, and sew them together before attaching the petals. This variation requires additional finishing.
Related : Easy Crochet Christmas Stocking Pattern for Beginners
Step 4: Attach the Keychain Ring
Use the metal ring and chain to turn your flower into a practical accessory.
- Choose a secure point at the top of the flower.
- Attach the chain to a sturdy stitch between two petals.
- Pull gently to make sure the attachment is secure.
- Trim and hide any remaining yarn ends.
Avoid attaching the ring to a loose yarn tail or a delicate part of a petal. A secure attachment helps the flower withstand everyday handling.
Your crochet daisy flower keychain is ready to use!
Color Ideas for Your Crochet Daisy
One of the best things about this project is how easily you can personalize it.
- Classic daisy: White petals with a yellow center.
- Pink daisy: Soft pink petals with a sunny yellow center.
- Lavender flower: Purple petals for a gentle, pastel look.
- Blue daisy: Light blue petals for a fresh, cheerful accessory.
- Rainbow flower: Use different colors for a playful design.
You can also experiment with contrasting centers, textured yarn, or miniature beads if the finished accessory is intended for an adult and the embellishments are securely attached.
Common Crochet Mistakes and How to Fix Them
Why are my petals curling?
Tight stitches or an unsuitable hook size can cause curling. Try a slightly larger hook and check your tension. Blocking may help with some yarn types, but always follow the yarn manufacturer’s care instructions.
Why does my flower look uneven?
Count your stitches and space the petals consistently around the center. Check the first and last petals to ensure they join neatly.
Why can I see gaps in the center?
Make sure the magic ring is pulled tightly closed and weave in the yarn tail securely. If the center still looks loose, try a smaller hook.
Why does the keychain feel flimsy?
Use a secure metal ring attachment and weave in all ends properly. Cotton yarn and firm, consistent stitches can also help the flower keep its shape.
Frequently Asked Questions
Is this crochet daisy keychain suitable for beginners?
Yes. The project uses basic crochet stitches and a small amount of yarn. Beginners should be comfortable making a magic ring, single crochet stitches, and chains, or be willing to practice them.
How long does it take to make?
The time depends on your crochet experience, yarn, and finishing technique. A small flower may take around an hour, but your first attempt could take longer.
Can I use acrylic yarn instead of cotton?
Yes. Acrylic yarn can work for this project, although the finished texture and firmness may differ. Choose a suitable hook and check how the petals hold their shape.
Can I use this flower as a bag charm?
Absolutely. You can attach it to a handbag, backpack, zipper pull, or another accessory using a secure keychain ring.
Can I sell finished crochet daisy keychains?
You can consider selling your own handmade finished items, subject to applicable laws and the terms governing any pattern or materials you use. If you plan to sell them, test the design, photograph your own finished work, and describe the product accurately.
Final Thoughts
This crochet daisy flower keychain is a charming way to explore small crochet projects and experiment with color. Whether you make a classic white daisy or a bright, colorful flower, the finished accessory can add a handmade touch to your everyday essentials.
Take your time with the petals, keep your stitches consistent, and secure the keychain ring carefully. Once you have refined your first flower, you can experiment with different sizes and color combinations to create your own collection of crochet accessories.
Happy crocheting!