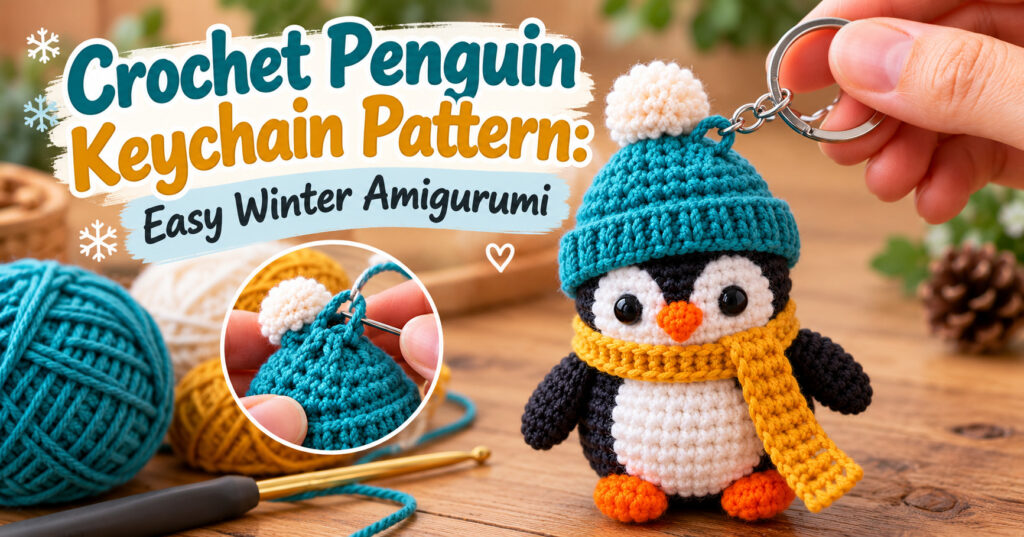
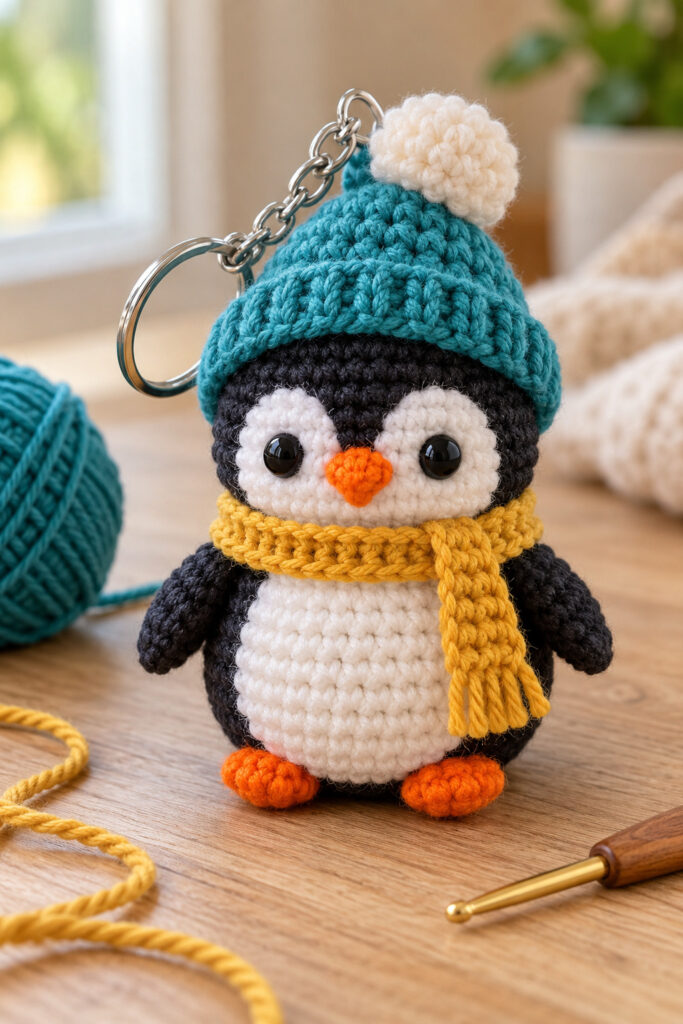
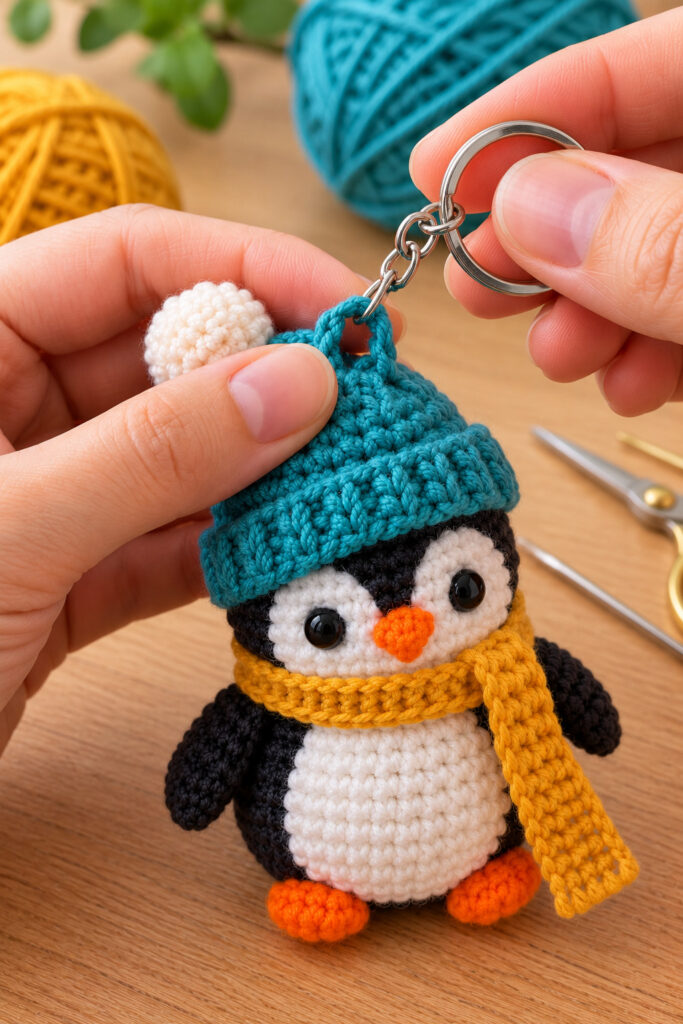
Have you ever wanted to make a tiny crochet friend that you can carry everywhere? This crochet penguin keychain is a fun little project with a round body, a white belly, tiny orange feet, and a cozy winter hat and scarf. It looks adorable hanging from a backpack, purse, or set of keys.
The best part is that you don’t need much yarn to make one. This small amigurumi penguin is a lovely way to use leftover yarn, practice basic crochet stitches, or create a handmade gift for someone special.
In this tutorial, you’ll learn how to crochet the penguin’s body, add the facial details, make its little wings and feet, and finish everything with a winter-inspired outfit. The instructions use US crochet terminology and include stitch counts to help you keep track as you work.
Project Details
- Skill level: Beginner-friendly
- Project type: Amigurumi and crochet keychain
- Finished size: Approximately 7–9 cm (2.75–3.5 inches), excluding the keychain hardware
- Crochet terminology: US terms
- Construction: Crocheted body with separately attached details
- Best use: Keychains, bag charms, stocking stuffers, and handmade gifts
The finished size will depend on your yarn, hook, and tension.
Materials You’ll Need
Gather these supplies before starting your crochet penguin keychain.
- Black or charcoal cotton yarn for the body and wings
- White cotton yarn for the belly
- Orange yarn for the beak and feet
- Teal yarn for the winter hat
- Mustard-yellow yarn for the scarf
- A 2–2.5 mm crochet hook suitable for your yarn
- Polyester fiberfill stuffing
- Two small safety eyes, approximately 4–6 mm
- Tapestry needle
- Stitch marker
- Scissors
- Metal keychain ring and short chain
- Optional embroidery thread for extra facial details
Helpful tip: Choose a smaller hook than you would normally use for the yarn. Tight stitches help keep the stuffing from showing through the finished penguin.
Related : Easy Crochet Sunflower Keychain Pattern for Beginners
Crochet Abbreviations
This pattern uses standard US crochet terms.
| Abbreviation | Meaning |
|---|---|
| MR | Magic ring |
| ch | Chain |
| sc | Single crochet |
| inc | Increase: 2 sc in the same stitch |
| dec | Decrease: crochet 2 stitches together |
| sl st | Slip stitch |
| st(s) | Stitch(es) |
| rnd | Round |
| FO | Fasten off |
The pattern is worked in continuous rounds unless a section specifically says otherwise. Use a stitch marker to identify the first stitch of every round.
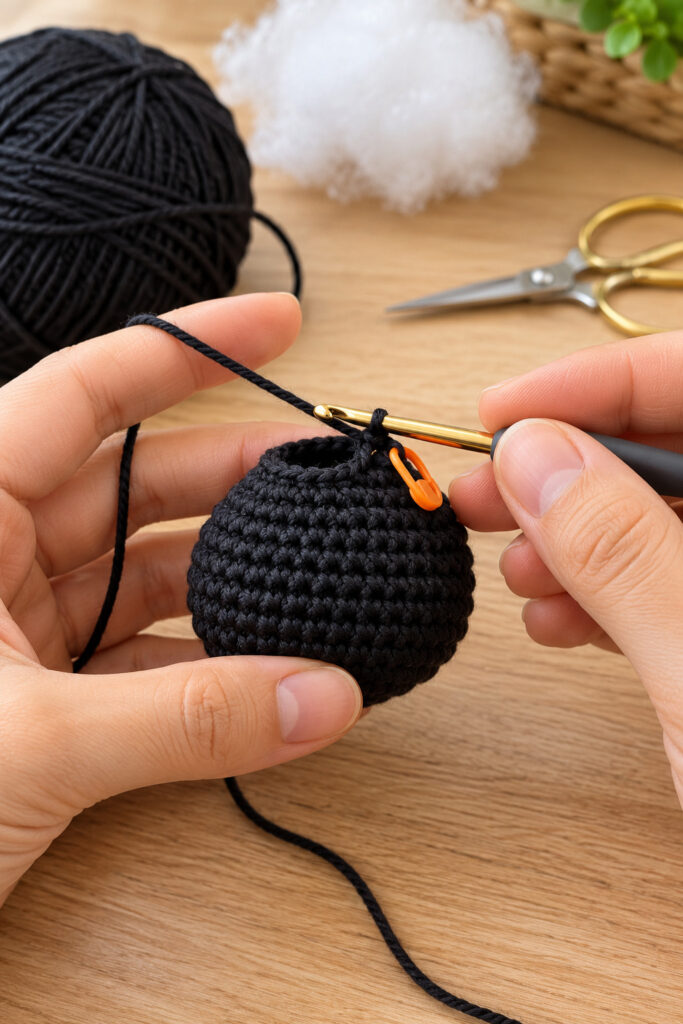
Step 1: Crochet the Penguin’s Body
The head and body are crocheted as one piece, which gives the penguin its soft, rounded shape.
Using black or charcoal yarn:
- Round 1: Make a magic ring and crochet 6 sc into the ring. (6 sts)
- Round 2: Inc in every stitch around. (12 sts)
- Round 3: (Sc 1, inc) repeat 6 times. (18 sts)
- Round 4: (Sc 2, inc) repeat 6 times. (24 sts)
- Rounds 5–8: Sc in every stitch around. (24 sts per round)
- Round 9: (Sc 2, dec) repeat 6 times. (18 sts)
- Round 10: Sc in every stitch around. (18 sts)
- Round 11: (Sc 1, dec) repeat 6 times. (12 sts)
Insert the safety eyes between Rounds 6 and 7, approximately 5–6 stitches apart, adjusting their position to suit the face. Secure the backs according to the manufacturer’s instructions.
Begin adding small amounts of fiberfill. Shape the body gently with your fingers so that it stays rounded without becoming too firm.
- Round 12: Dec 6 times. (6 sts)
Fasten off, leaving a long yarn tail. Thread the tail through the remaining front loops and pull gently to close the opening. Weave in the end securely.
Step 2: Make the White Belly Patch
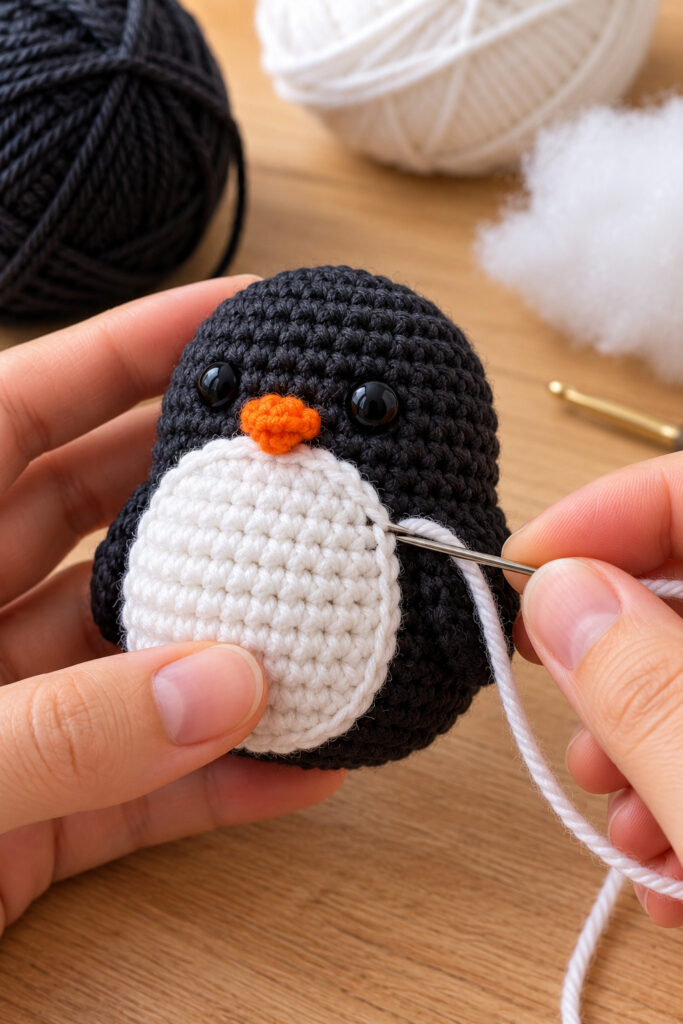
The white belly gives your penguin its familiar appearance. Instead of changing colors throughout the body, this design uses a separate white oval that you sew onto the front.
Using white yarn:
- Round 1: Make a magic ring and crochet 6 sc into it. (6 sts)
- Round 2: Inc in every stitch around. (12 sts)
- Round 3: (Sc 1, inc) repeat 6 times. (18 sts)
- Round 4: (Sc 2, inc) repeat 6 times. (24 sts)
Fasten off, leaving a long tail for sewing.
Flatten the circle slightly and shape it into a gentle oval with your fingers. Position it on the front center of the black body, with the upper edge just below the eyes.
Using your tapestry needle, sew around the edges with small, even stitches. Try to keep the white patch centered and smooth.
Related : Easy Crochet Daisy Flower Keychain Pattern for Beginners
Helpful tip: Before sewing, use a few removable stitch markers to hold the belly in place. This makes it easier to check the placement from the front and sides.
Step 3: Crochet the Tiny Orange Beak
The beak is a small detail, but it gives the penguin its personality.
Using orange yarn:
- Round 1: Make a magic ring and crochet 4 sc into it. (4 sts)
- Round 2: Sc in every stitch around. (4 sts)
Fasten off, leaving a long tail for sewing.
Gently flatten the little piece and shape it into a small triangular-looking beak. Sew it onto the center of the face, just below and between the eyes.
Keep the beak small so it doesn’t cover too much of the white face area.
Step 4: Crochet the Wings
Make two identical wings using black or charcoal yarn.
For each wing:
- Round 1: Make a magic ring and crochet 6 sc into it. (6 sts)
- Round 2: Sc in every stitch around. (6 sts)
- Round 3: Sc in every stitch around. (6 sts)
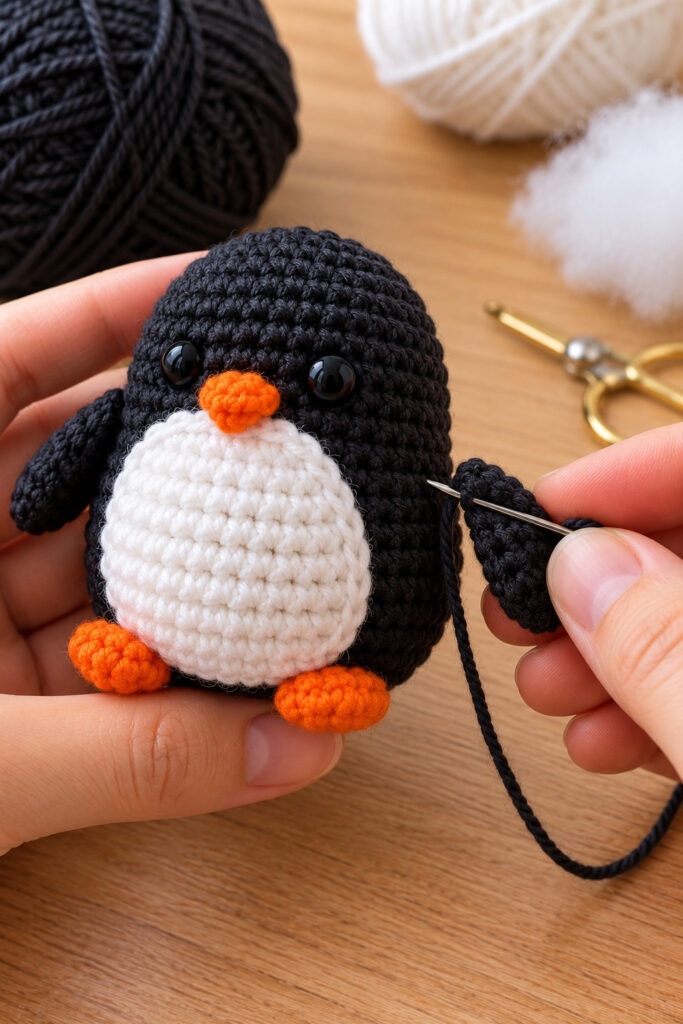
Fasten off, leaving a long tail. Flatten each piece slightly rather than stuffing it.
Position one wing on each side of the penguin’s body. Angle the wings slightly downward to create a natural, relaxed pose.
Sew them firmly in place, keeping them at approximately the same height on both sides.
Step 5: Crochet the Orange Feet
The tiny orange feet help the penguin look balanced and complete.
Make two feet using orange yarn.
For each foot:
- Round 1: Make a magic ring and crochet 6 sc into it. (6 sts)
- Round 2: Inc in every stitch around. (12 sts)
- Round 3: Sc in every stitch around. (12 sts)
Fasten off, leaving a long tail for sewing. Flatten the pieces slightly and add a tiny amount of stuffing if needed.
Sew both feet to the bottom front of the body, placing them side by side beneath the white belly.
Before securing the second foot, check that the penguin sits or hangs evenly and that the feet face forward.
Step 6: Make a Simple Winter Beanie
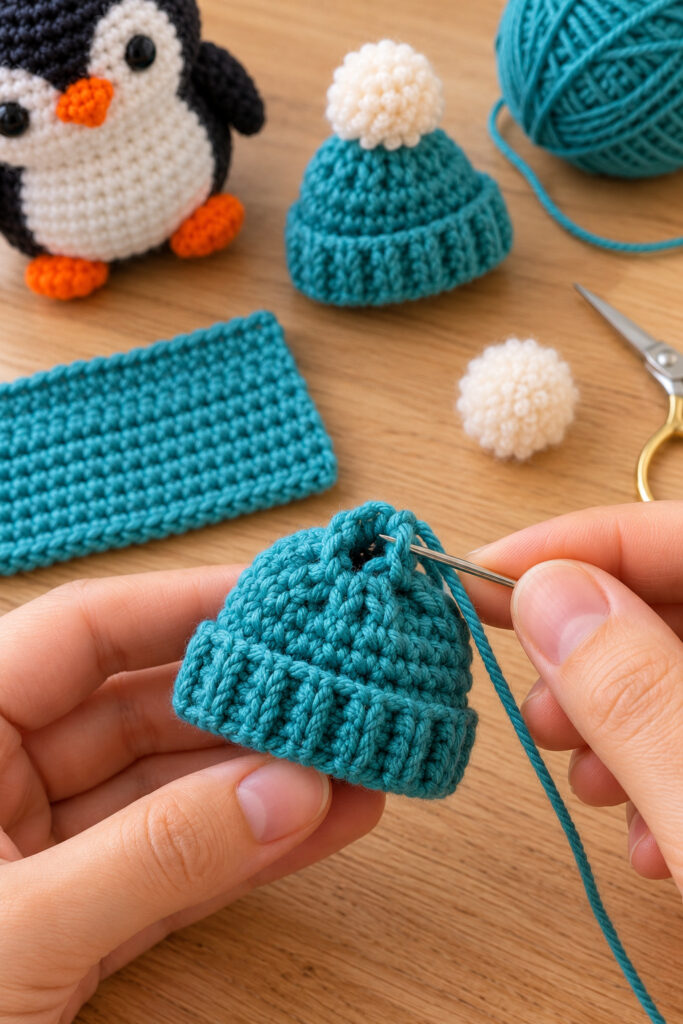
A little teal hat adds a colorful winter touch to the penguin. This version is made from a small crocheted rectangle and then shaped into a miniature cap.
Using teal yarn:
- Row 1: Ch 13. Starting in the second chain from the hook, sc across. (12 sts)
- Rows 2–7: Ch 1, turn, and sc across. (12 sts per row)
Fasten off, leaving a long sewing tail.
Fold the rectangle in half so the short edges meet. Sew the short edges together to create a small tube, then gather one end with the yarn tail and pull it closed. Turn the hat right side out.
For a simple pom-pom, use cream yarn to make a tiny yarn pom-pom, or crochet a small sphere with 6 sc in a magic ring and close it after one round. Attach it securely to the gathered top.
Place the beanie on the penguin’s head and sew it in place with a few discreet stitches.
Fit tip: The hat dimensions will vary with yarn thickness and tension. Try it on the penguin before closing the seam completely.
Step 7: Crochet a Miniature Scarf
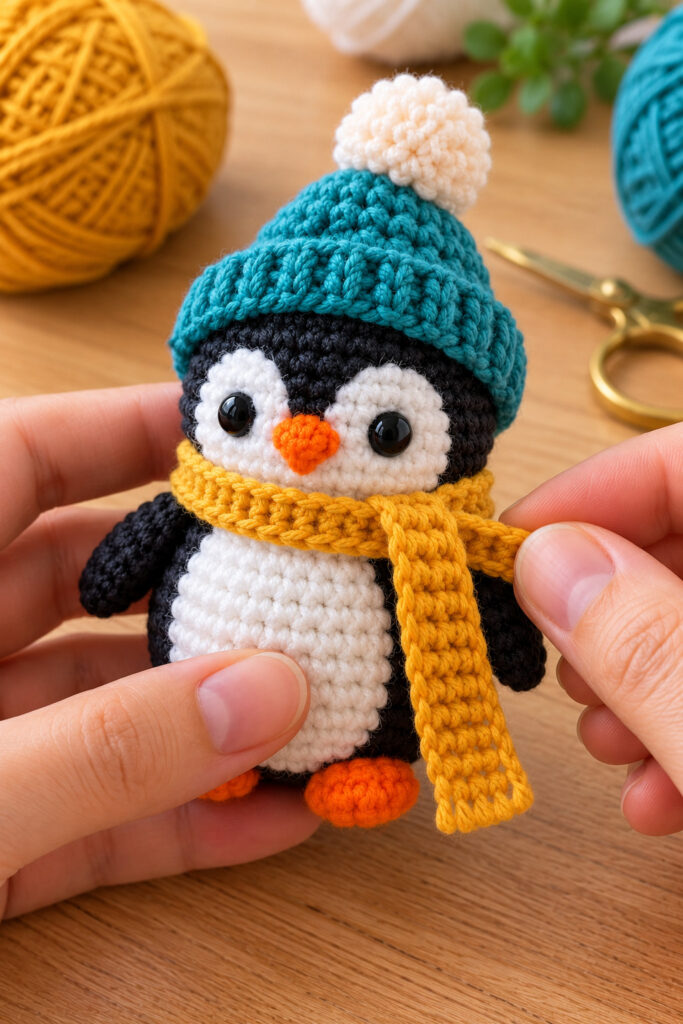
The mustard-yellow scarf adds contrast to the black and white body and makes the finished keychain feel cozy.
Using mustard-yellow yarn:
- Row 1: Ch 5. Starting in the second chain from the hook, sc across. (4 sts)
- Rows 2–24: Ch 1, turn, and sc across. (4 sts per row)
Fasten off and weave in the starting end.
Wrap the scarf loosely around the penguin’s neck, just below the head. Let one end hang over the white belly. Secure the scarf with a few small stitches at the back so it stays in place without pulling the fabric out of shape.
If you prefer a longer or shorter scarf, adjust the number of rows to suit your penguin.
Step 8: Attach the Keychain Hardware
The last step turns your little penguin into a useful accessory.
You’ll need a small metal keychain ring and a short chain. If your hardware has a jump ring, use suitable jewelry pliers to open it by twisting the ends sideways rather than pulling them apart.
Attach the chain to a securely reinforced loop of yarn at the top of the penguin’s head. Pass the yarn through several sturdy stitches near the crown, reinforce it with multiple passes, and secure the ends inside the crochet fabric. Connect the metal hardware to that loop and close the jump ring fully.
Give the attachment a gentle pull to check that it feels secure. Avoid relying on a single loose yarn strand to hold the keychain.
Important: Small metal parts and plastic safety eyes can pose choking hazards. This finished keychain is an accessory, not a toy for children under three years old. For a child-friendly decorative version, omit the metal hardware and use embroidered eyes instead, while following appropriate toy-safety requirements.
Finishing Touches
Before using your crochet penguin keychain, take a moment to check the details.
- Make sure the belly patch is centered and lies flat.
- Check that the eyes and beak are aligned.
- Secure any loose yarn ends inside the body.
- Confirm that both wings and feet are firmly attached.
- Adjust the scarf and hat so they sit neatly.
- Check the keychain hardware and make sure the jump ring is completely closed.
If you’d like to make several penguins, experiment with different hat and scarf colors. Pastel blue, forest green, burgundy, and cream all look lovely against the black and white body.
Frequently Asked Questions
Is this crochet penguin keychain suitable for beginners?
Yes, it is beginner-friendly if you’re comfortable with basic stitches such as single crochet, increases, decreases, and sewing crochet pieces together. Beginners may need a little extra time for the small details.
What yarn works best for a small crochet penguin?
Cotton or a cotton-acrylic blend is a good choice because it shows stitch definition clearly. Choose a yarn and hook combination that produces tight stitches.
How big will the finished penguin be?
The penguin body and accessories should measure approximately 7–9 cm tall with suitable lightweight yarn, excluding the keychain hardware. Actual measurements depend on your tension and materials.
Can I sell finished penguin keychains made from this pattern?
You can make finished items for personal use or gifts. Before selling them, check the usage terms that apply to the pattern you use and comply with local product-safety requirements. This original tutorial is provided for personal crafting; do not redistribute or claim the written pattern as your own.
Can I make this penguin without safety eyes?
Yes. Embroidered eyes made with black yarn are an alternative to plastic safety eyes. This is also a better option for decorative items intended for young children, although the complete item must still meet relevant safety requirements.
Final Thoughts
This crochet penguin keychain is a small project with plenty of personality. Its rounded body, bright orange feet, colorful winter accessories, and handmade details make it a charming addition to your keys or bag.
Take your time with the assembly, keep your stitches neat, and don’t worry if your first penguin looks a little different from the example. Small handmade differences are part of what makes crochet special.
Once you’ve finished your penguin, try experimenting with new colors and accessories to create your own little winter collection.
Enjoy your crochet time, and happy stitching!