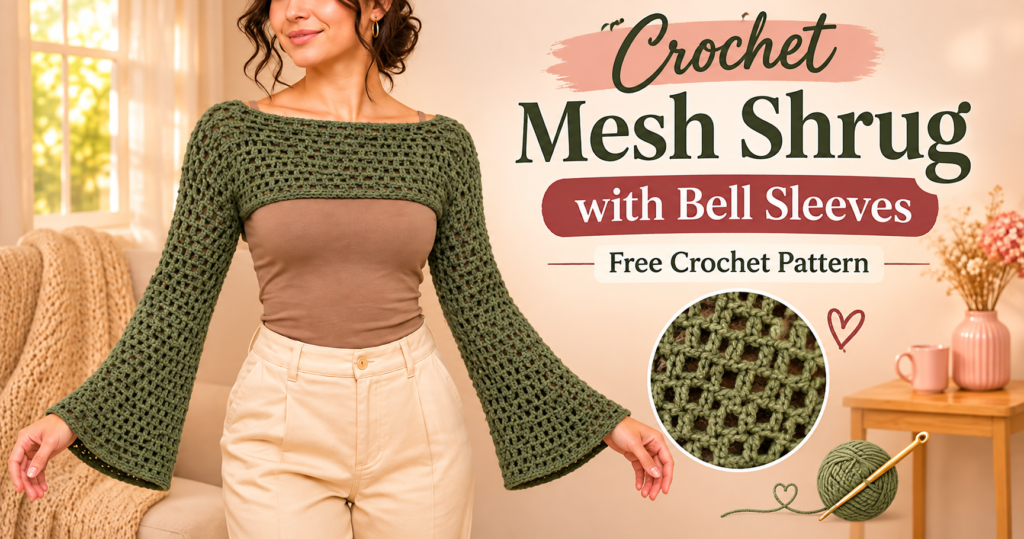
There is something special about a lightweight crochet shrug that you can throw over almost any outfit. It adds a little texture, a touch of personality, and just enough coverage without making your outfit feel too heavy.
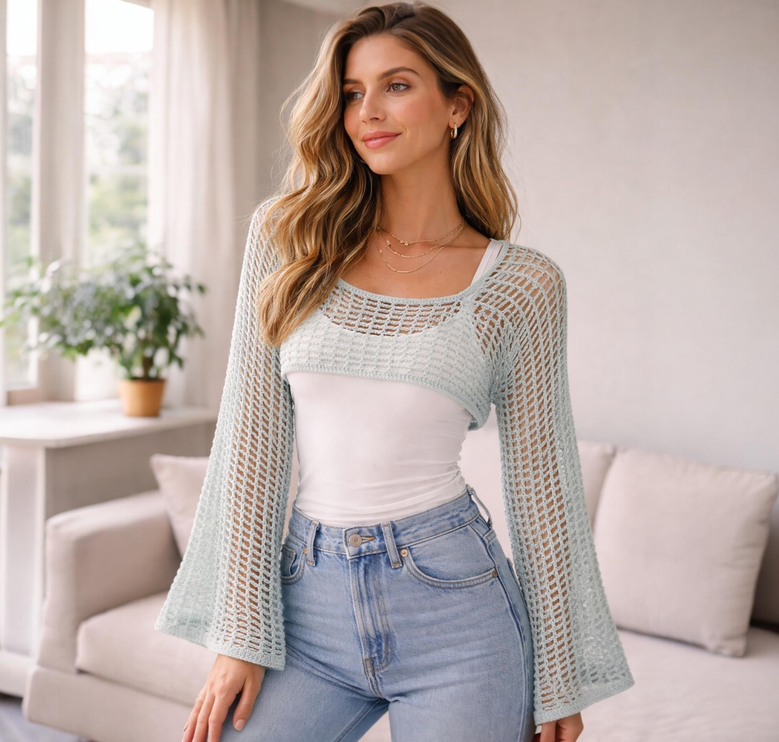
This crochet mesh shrug with bell sleeves is a lovely project if you enjoy creating wearable pieces with a relaxed, feminine shape. The open mesh fabric gives it an airy appearance, while the sleeves gradually widen toward the wrists to create a soft bell-shaped finish.
I especially love how versatile this design can be. Wear it over a simple tank top, a fitted dress, or even a basic summer outfit. You can make it in a neutral shade for everyday wear or choose a brighter color if you want something that stands out.
The construction is also quite interesting. Instead of making several complicated garment pieces, you will work the main body as two connected panels, join the sides to form the arm openings, and then crochet the sleeves directly onto the garment.
The pattern is made to measure, so you can adjust the body width, sleeve length, and bell shaping to suit your preferred fit.
Let’s get started!
Crochet Mesh Shrug Pattern at a Glance
| Feature | Details |
|---|---|
| Project | Mesh shrug with bell sleeves |
| Skill level | Intermediate |
| Construction | Two body panels with attached sleeves |
| Crochet terms | US terminology |
| Yarn weight | Worsted / Medium #4 |
| Hook size | 5 mm (H-8) |
| Stitch pattern | Double crochet mesh |
| Fit | Relaxed and lightweight |
| Sleeve style | Flared bell sleeves |
| Customization | Made to measure |
Materials You’ll Need
Before beginning, gather everything you need. Having your materials ready makes the project much easier, especially when working on a garment that requires matching measurements on both sides.
Related : Beaded Crochet Christmas Ornament , Free Tree Pattern
Yarn
For this project, choose a medium-weight yarn with a nice drape.
Recommended options include:
- Approximately 450–650 yards (411–594 m) of worsted-weight yarn.
- Cotton or cotton-blend yarn for a breathable summer shrug.
- Acrylic yarn for a softer, budget-friendly option.
- A lightweight acrylic-cotton blend for comfortable everyday wear.
The exact amount will depend on your measurements, sleeve length, and how wide you make the bell cuffs.
Crochet Hook
- 5 mm crochet hook.
- Adjust your hook size if your mesh fabric feels too tight or too loose.
Additional Supplies
- Measuring tape.
- Scissors.
- Tapestry needle.
- Stitch markers.
- A few safety pins for checking garment placement.
Understanding the Mesh Stitch
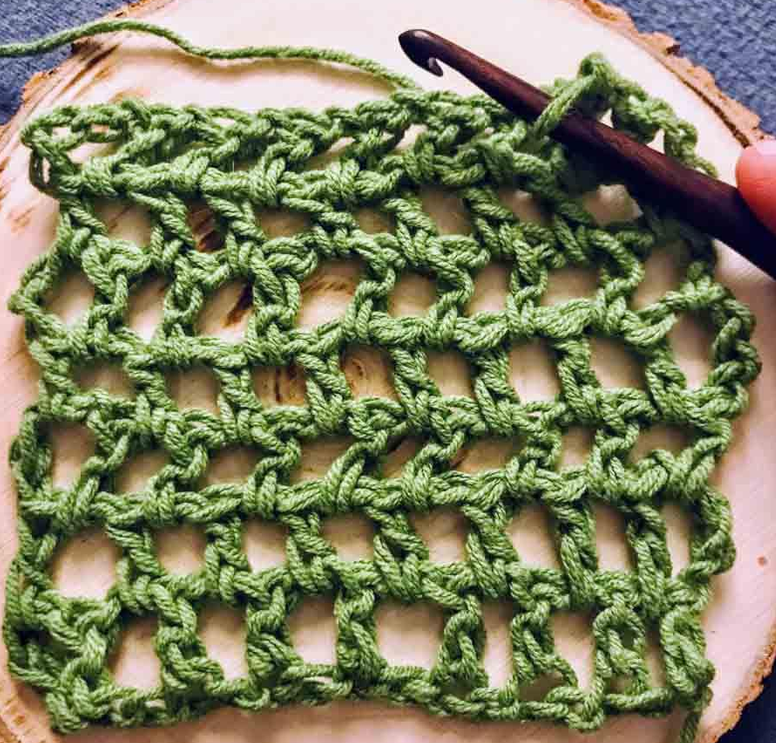
The main body and sleeves use a simple open mesh pattern created with double crochet stitches and chain spaces.
The combination produces small square openings that allow the fabric to remain flexible and breathable.
Abbreviations (US Terms)
- ch – Chain
- st – Stitch
- sl st – Slip stitch
- sc – Single crochet
- dc – Double crochet
- ch-sp – Chain space
- rep – Repeat
- RS – Right side
- WS – Wrong side
Special Stitch: Double Crochet Mesh
The mesh pattern is worked using the following sequence:
- Make a double crochet into the designated chain space.
- Chain 2.
- Make another double crochet into the next chain space.
- Continue repeating the sequence across the row.
Each pair of double crochet stitches creates an open space between them.
Important: Work your double crochet stitches into the chain spaces rather than into the tops of the previous double crochet stitches. This helps maintain the open mesh appearance.
Taking Your Measurements
Because this shrug is designed to be adjustable, measuring before starting will help you achieve a comfortable fit.
You will need four main measurements.
1. Shoulder Width
Measure across your upper back from one shoulder to the other. This helps determine the width of the shrug’s upper section.
2. Front and Back Length
Measure from your upper shoulder area down to the point where you want the shrug to finish.
3. Sleeve Length
Measure from the underarm to your wrist or preferred sleeve ending.
4. Upper Arm Circumference
Measure around the widest part of your upper arm. Add a little extra room for comfort.
Choosing Your Fit
For a fitted appearance, keep the mesh fabric closer to your measurements.
For a relaxed, flowing shrug, allow a little extra room around the upper body and sleeves.
Always make a small swatch before beginning. Mesh fabric can stretch considerably, particularly after washing and wearing.
Part 1 – Creating the Front Panel
Start by making the front section of your shrug.
Choose your preferred yarn color and make a foundation chain that matches your shoulder-to-shoulder measurement.
For the sample construction, begin with 60 chains. You can increase or decrease this number to suit your measurements, keeping the foundation compatible with the mesh repeat.
Foundation Row:
Ch 60.
Ch 6, dc in the 6th chain from the hook. Continue working ch 2, skip 2 chains, dc in the next chain across the foundation.
You should have approximately 20 mesh openings, depending on the foundation arrangement.
Row 2:
Ch 5 and turn.
Dc in the first available chain space. Repeat ch 2, dc in the next chain space across the row.
Rows 3–10:
Repeat Row 2 until the front panel reaches your desired depth.
For the sample, work a total of 10 rows.
Try the panel against your body. It should reach comfortably below the underarm area without feeling restrictive.
If you need additional coverage, simply add more mesh rows.
Helpful tip: Count your rows and write down the final number. You will need the same depth for the back panel.
Related : Crochet Frog Amigurumi Pattern , Cute Little Green Frog
Part 2 – Creating the Shoulder and Neckline Opening
Now that the front panel is complete, you will create the opening that allows the shrug to sit comfortably around your neck and shoulders.
Lay your front panel flat with the working edge facing upward.
The idea is to leave a small mesh section at each shoulder and connect them with a loose chain bridge.
For the sample construction:
- Work across approximately four mesh openings at the first shoulder.
- Leave the center section open for the neckline.
- Create a loose chain bridge across the center.
- Attach the bridge to the opposite shoulder section.
- Continue working the remaining shoulder spaces.
For the sample, a chain bridge of approximately 36 chains provides a starting point.
However, this number should not be treated as a universal neckline size.
Try the opening over your head before continuing. If it feels too tight, increase the bridge length. If it falls too low, reduce the number of chains.
The neckline should feel comfortable without pulling the shoulder sections inward.
Part 3 – Working the Back Panel
With the neckline bridge complete, you can begin building the back of the shrug.
Turn your work and start crocheting across the shoulder sections and chain bridge.
Row 1:
Ch 5 and turn.
Work the double crochet mesh pattern across the first shoulder section.
When you reach the neckline bridge, work the mesh stitches evenly across the chains.
Continue across the opposite shoulder section.
Following Rows:
Ch 5, turn, and continue the same mesh pattern across the entire back.
Work the same number of rows as your front panel.
For example, if your front panel has 10 rows, make the back panel approximately 10 rows as well.
Lay both sections together and check that the side edges match.
At this stage, you should have a lightweight shrug shape with an opening for your head and two open side sections for the sleeves.
Part 4 – Joining the Underarm Sections
Before starting the sleeves, the front and back sections need to be connected underneath the arms.
Fold the garment at the shoulder area so that the front and back panels sit together.
Align the side edges carefully.
Using your crochet hook, join the matching edges with slip stitches.
Work a small, even join underneath each arm while leaving enough space for your arms to pass through comfortably.
Repeat on the opposite side.
Do not make the joins too tight. A tight seam can affect how the sleeves sit and may pull the garment out of shape.
Once both sides are joined, try the shrug on.
Check that the arm openings feel comfortable and that the neckline sits naturally.
Part 5 – Crocheting the Straight Sleeves
Now comes the fun part!
The sleeves are worked directly around the arm openings using the same mesh stitch as the body.
Attach your yarn at the underarm join.
Round 1:
Ch 5.
Work double crochet stitches and chain spaces evenly around the arm opening.
Continue the mesh pattern until you reach the starting point.
Join with a slip stitch.
Count your mesh spaces and write down the total.
This number will be important when making the second sleeve.
Rounds 2–16:
Ch 5 and turn.
Skip the first chain space, then work the mesh pattern around the sleeve.
Join with a slip stitch at the end of each round.
Continue until the straight section reaches approximately your elbow.
The sample uses 16 rounds, but your number may be different depending on your arm length and crochet tension.
Try the sleeve on occasionally.
It should fit comfortably around your arm without being too tight.
Part 6 – Shaping the Bell Sleeves
This is the detail that gives the shrug its beautiful silhouette.
Instead of keeping the sleeves the same width all the way down, you will gradually increase the number of mesh openings.
The increases create a gentle flare that becomes wider toward the cuffs.
Understanding the Increase
To increase, work two double crochet stitches into one chain space, with a chain 2 between them.
In other words:
(dc, ch 2, dc) in the same chain space.
This creates an additional mesh opening.
Bell Sleeve Instructions
Continue working in joined, turned rounds.
Bell Round 1:
Ch 5 and turn.
Skip the first chain space.
Work ordinary mesh in the next two spaces, then make an increase in the third space.
Repeat this arrangement around the sleeve.
Bell Rounds 2–3:
Work ordinary mesh without increases.
Bell Round 4:
Work an increase approximately every fifth mesh space.
Work ordinary mesh in the remaining spaces.
Bell Rounds 5–6:
Continue the mesh pattern without increases.
Bell Round 7:
Increase approximately every seventh mesh space.
Bell Rounds 8–9:
Work ordinary mesh.
Bell Round 10:
Increase approximately every ninth mesh space.
Bell Rounds 11–12:
Continue ordinary mesh without increases.
You should now notice the sleeve opening becoming wider and more decorative.
Adjusting the Bell Shape
You can easily change the appearance of your sleeves.
- For a subtle flare, space your increases farther apart.
- For a wider bell shape, add more increase rounds.
- For a shorter sleeve, stop before completing all the bell rounds.
- For a dramatic flowing sleeve, continue the mesh and spaced increases until you reach your preferred length.
Try the sleeve on before fastening off.
Make sure the opening is wide enough to move comfortably around your wrist and hand.
Part 7 – Making the Second Sleeve
The second sleeve should match the first one as closely as possible.
Attach your yarn at the opposite arm opening.
Repeat the same process:
- Pick up the same number of mesh spaces.
- Work the same number of straight sleeve rounds.
- Follow the same bell increase sequence.
- Keep the overall sleeve length consistent.
- Compare both cuffs before finishing.
A simple trick is to keep your notes beside you while crocheting.
Write down the number of mesh spaces, straight rounds, and increase rounds from the first sleeve.
This will help you avoid differences between