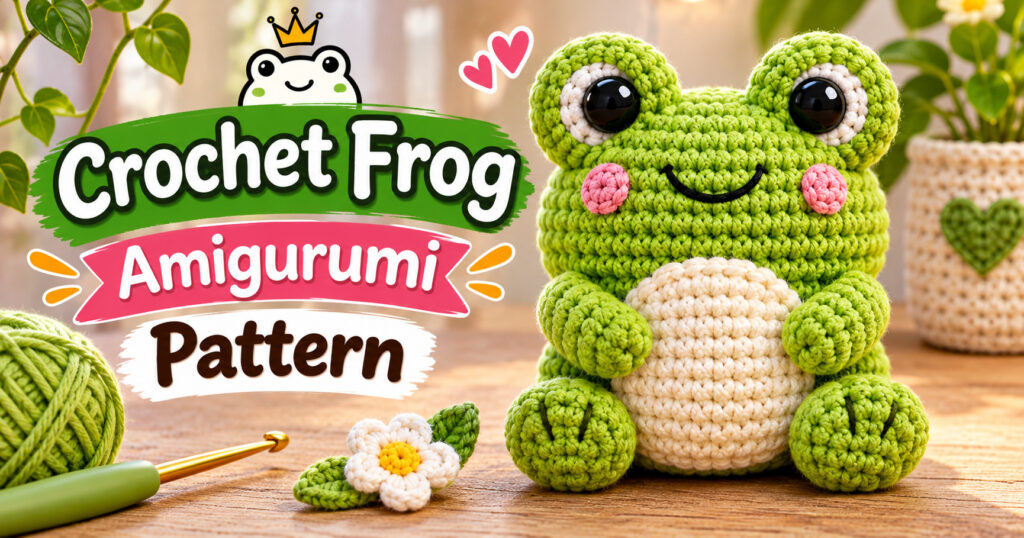
If you love making cute crochet animals, this little frog amigurumi is a project worth adding to your collection. With its round green body, big raised eyes, tiny feet, and sweet little smile, this handmade frog has plenty of personality.
It’s the kind of crochet project that makes you smile as you work on it. The design is small, doesn’t require much yarn, and is a lovely choice for anyone who enjoys making adorable amigurumi toys.
In this tutorial, we’ll create a little sitting frog using basic crochet stitches. You’ll learn how to make the body, eyes, belly, arms, and feet, then bring everything together with a few simple finishing details.
Whether you’re making one for yourself, a friend, or your handmade toy collection, this crochet frog is a fun project to try.
Related : Mini Crochet Ghost Amigurumi Pattern , Easy Halloween Project
Why You’ll Love This Crochet Frog
There are so many reasons to love this little green friend!
- Cute and simple design: Its round shape and big eyes give it an adorable appearance.
- Small yarn requirements: A great project for using leftover green and cream yarn.
- Beginner-friendly techniques: The pattern uses mostly single crochet, increases, and decreases.
- Easy to customize: Try different colors, expressions, and little accessories.
- Lovely handmade gift: Perfect for frog lovers, children, and amigurumi collectors.
Finished Size
When made with DK cotton yarn and a 2.5 mm crochet hook, the finished frog measures approximately 7–8 cm (2.75–3.15 inches) tall.
The final size may vary depending on your yarn thickness, hook size, and crochet tension.
Materials You’ll Need
Gather these supplies before getting started:
- Green cotton yarn for the main body.
- Cream or white cotton yarn for the belly.
- Small amounts of black yarn for the smile.
- Pink yarn for optional cheeks.
- 2.5 mm crochet hook.
- Polyester fiberfill stuffing.
- 6 mm safety eyes or black embroidery thread.
- Stitch marker.
- Tapestry needle.
- Scissors.
Optional: You can use a little pink yarn to add rosy cheeks or a small piece of yellow yarn to make a tiny flower accessory.
Crochet Abbreviations (US Terms)
This pattern uses standard US crochet terminology.
- MR – Magic Ring
- ch – Chain
- sc – Single Crochet
- sl st – Slip Stitch
- hdc – Half Double Crochet
- inc – Increase (2 sc in the same stitch)
- dec – Decrease (sc 2 stitches together)
- st – Stitch
- rnd – Round
- BLO – Back Loop Only
Work in continuous rounds unless otherwise mentioned. Use a stitch marker to keep track of the beginning of each round.
Related : Mini Crochet Santa Pattern: Cute Christmas Amigurumi
Skill Level
Beginner to advanced beginner.
You should know how to make a magic ring, single crochet, increase, decrease, and sew small crochet pieces together.
Gauge and Finished Size
Gauge isn’t essential for this project, but your stitches should be tight enough to prevent stuffing from showing through.
| Yarn | Hook | Approximate height |
|---|---|---|
| DK cotton | 2.5 mm | 7–8 cm |
| Worsted cotton | 3.5 mm | 9–10 cm |
These measurements are approximate and depend on your individual tension.
Crochet Frog Amigurumi Pattern
Let’s start making our little frog! We’ll work on the body first, followed by the eyes, belly, arms, and feet.
Part 1 – Frog Body and Head
Using green yarn, begin with the main body. The head and body are worked as one piece, so you won’t need to sew them together later.
Round 1: Make 6 sc in a magic ring (6).
Round 2: Inc in every stitch around (12).
Round 3: (1 sc, inc) repeat 6 times (18).
Round 4: (2 sc, inc) repeat 6 times (24).
Round 5: (3 sc, inc) repeat 6 times (30).
Round 6: (4 sc, inc) repeat 6 times (36).
Rounds 7–12: Sc in every stitch around (36).
Round 13: (4 sc, dec) repeat 6 times (30).
Round 14: (3 sc, dec) repeat 6 times (24).
Start adding stuffing. Make sure the lower part stays rounded and slightly flattened so the frog can sit.
Round 15: (2 sc, dec) repeat 6 times (18).
Round 16: (1 sc, dec) repeat 6 times (12).
Add a little more stuffing if necessary.
Round 17: Dec 6 times (6).
Fasten off and close the remaining opening using a tapestry needle.
Part 2 – Make the Frog’s Eyes
The large raised eyes are one of the cutest features of this little frog.
Using green yarn, make two eye bumps.
Round 1: Make 6 sc in a MR (6).
Round 2: Inc in every stitch (12).
Rounds 3–4: Sc around (12).
Round 5: Dec 6 times (6).
Add a tiny amount of stuffing and fasten off, leaving a long tail for sewing.
Make two identical pieces.
Eye Details:
You can use 6 mm safety eyes or embroider the pupils using black yarn.
If using safety eyes, attach them securely before sewing the eye bumps closed.
Position both eyes on the upper part of the frog’s head, leaving a small space between them.
Part 3 – The Cream Belly Patch
Using cream yarn, create a small oval-shaped belly.
Round 1: Ch 6.
Round 2: Starting in the second chain from the hook, work 4 sc, 3 sc in the last chain, then continue along the opposite side of the chain with 3 sc and 2 sc in the final stitch (12).
Round 3: Inc, 3 sc, 3 inc, 3 sc, 2 inc (18).
Round 4: Sc around (18).
Fasten off, leaving a long tail for sewing.
Place the belly patch in the center of the frog’s body and sew around the edges using small, neat stitches.
Part 4 – The Little Frog Arms
Make two arms using green yarn.
Round 1: Make 5 sc in a MR (5).
Rounds 2–7: Sc around (5).
Fasten off, leaving a long sewing tail.
Do not stuff the arms. Flatten the opening gently and sew it closed.
Attach one arm to each side of the body. Position the hands slightly toward the front so they appear to rest against the belly.
Part 5 – The Frog Feet
Make two little feet using green yarn.
Round 1: Make 6 sc in a MR (6).
Round 2: (1 sc, inc) repeat 3 times (9).
Round 3: Sc around (9).
Round 4: (2 sc, inc) repeat 3 times (12).
Fasten off and leave a long sewing tail.
Add a tiny amount of stuffing if you want the feet to look fuller.
Sew both feet to the bottom front of the frog’s body, making sure they point slightly outward.
Part 6 – Add the Frog’s Smile
Now comes the fun part!
Using black embroidery thread or thin black yarn:
- Find the center of the face.
- Use a few small stitches to create a curved smile.
- Keep the smile slightly below the eyes.
- Add two small pink stitches on either side for rosy cheeks.
You can make the expression happy, sleepy, or even a little surprised.
Putting Your Crochet Frog Together
Before sewing everything permanently, use pins to position the pieces and check that the frog looks balanced.
Follow these steps:
- Eyes: Attach the two raised eye bumps to the top of the head. Make sure they are evenly spaced.
- Belly: Position the cream oval in the middle of the body and sew around the edges.
- Arms: Attach both arms to the sides, angling them slightly toward the belly.
- Feet: Sew the feet to the bottom front of the body.
- Face: Embroider the smile and add the optional rosy cheeks.
Check the overall shape and adjust the stuffing if needed.
Your little green frog is now ready!
Helpful Tips for a Neat Amigurumi Finish
Even a simple amigurumi project can look much more professional with a few small tricks.
Use tight stitches: A smaller hook helps create a firm fabric and prevents stuffing from showing.
Stuff gradually: Add fiberfill in small amounts instead of filling the entire body at once. This helps maintain a smooth shape.
Position pieces before sewing: Use pins to check the placement of the eyes, belly, arms, and feet before attaching them.
Keep your tension consistent: This makes the finished frog look symmetrical and helps all the pieces fit together.
Hide yarn tails carefully: Pull loose ends inside the body using a tapestry needle.
Fun Ways to Customize Your Crochet Frog
One of the best things about making amigurumi is that you can change the design to suit your style.
Here are a few cute ideas:
| Variation | What to change |
|---|---|
| Strawberry Frog | Use pink yarn for the body and add tiny white details. |
| Sleepy Frog | Embroider closed eyes instead of using safety eyes. |
| Pastel Frog | Try mint green, lavender, or soft yellow yarn. |
| Flower Frog | Add a small crocheted flower between the eyes. |
| Prince Frog | Make a tiny yellow crown using leftover yarn. |
| Tiny Keychain Frog | Add a metal keychain loop to the top. |
You can even make several frogs in different colors and create your own little crochet frog family!
Troubleshooting Common Crochet Problems
Why does my frog look too round?
This can happen if the body is overstuffed. Try reducing the amount of stuffing near the bottom and gently shaping the base with your hands.
Why are my frog’s eyes uneven?
Before sewing the eyes permanently, pin both pieces in place and compare their height and spacing. Adjust them until they look symmetrical.
Why can I see the stuffing?
Your stitches may be too loose, or your crochet hook may be too large for your yarn. Try using a smaller hook to create tighter stitches.
Why does my frog lean backward?
Check the placement of the feet and make sure the stuffing is distributed evenly. Moving the feet slightly forward or backward can also help balance the body.
Safety and Care
If you’re making this frog as a toy, embroider the eyes instead of using plastic safety eyes for children under three.
Make sure all sewn pieces are secure and check the seams regularly.
To clean your finished frog, gently hand wash it in cool water with mild detergent. Avoid twisting or squeezing it too hard. Allow it to air dry completely.
A handmade crochet toy is not automatically a certified baby toy, so always consider the intended age and use.
Frequently Asked Questions
How long does it take to crochet a frog amigurumi?
Most crocheters can complete this little frog in approximately 2–3 hours, depending on their experience and how quickly they sew the pieces together.
How much yarn do I need?
You only need small amounts of yarn. Approximately 20–30 yards of green yarn and 5–8 yards of cream yarn should be enough for this small design, with a little extra for sewing.
Is this crochet frog suitable for beginners?
Yes! The pattern uses basic amigurumi techniques. If you already know how to make a magic ring, single crochet, increases, and decreases, you can give it a try.
Can I use different yarn?
Absolutely. Cotton yarn gives the frog a neat finish, while acrylic yarn can make it softer. Just remember to adjust your hook size to match your yarn.
Can I make the frog bigger?
Yes. Use thicker yarn and a larger crochet hook. The stitch counts can remain the same, although the final size will change.
Can I sell finished frogs made from this pattern?
You can consider selling your finished handmade frogs, subject to the applicable pattern license and marketplace rules. Always check the terms attached to the pattern you use.
Final Thoughts
This little crochet frog is a lovely project for anyone who enjoys making cute handmade animals. Its round body, raised eyes, tiny feet, and sweet smile make it a fun addition to any amigurumi collection.
You don’t need a lot of yarn or complicated techniques to create something special. A little patience, a crochet hook, and a few leftover yarn colors are all you need to get started.
Make one in classic green, experiment with pastel shades, or create an entire family of colorful little frogs.
Happy crocheting!